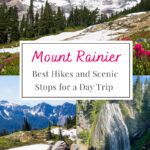
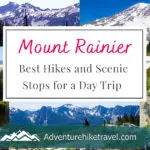
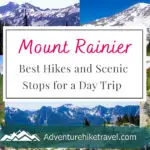
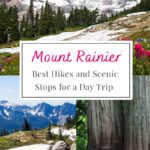
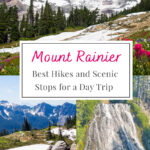
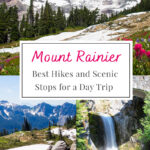
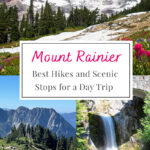
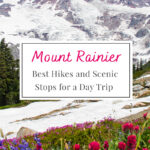
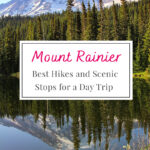
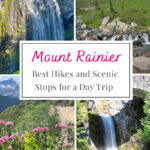
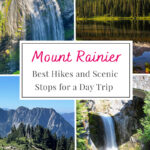
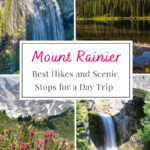
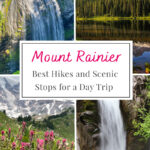
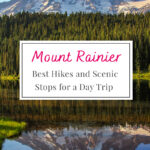
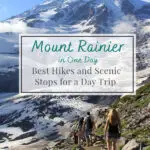
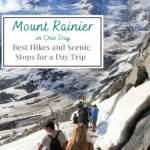
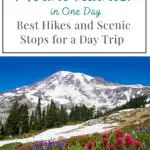
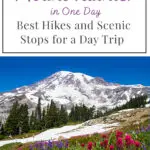
Mount Rainier in One Day: Best Hikes and Scenic Stops for a Day Trip


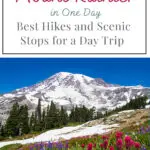

Mount Rainier National Park is stunning with its many breathtaking views, spectacular waterfalls, beautiful meadows of wildflowers, and awe-inspiring glaciers. This gem in the Pacific Northwest has so much to offer residents and visitors alike. This magnificent place can be visited over and over again and you can still explore new trails each time. But if you are planning a one-day trip and want to see the best sites, I have created a one-day itinerary with many must-see spots and hikes.
This itinerary is packed with adventure, taking you on a full day of exploration at Mount Rainier. Starting at the Nisqually Entrance, you’ll visit iconic spots like historic Longmire, marvel at breathtaking waterfalls, explore the beauty of Paradise, and hike through scenic trails, and view Reflection Lakes. Then finish the day by strolling through the truly massive old-growth forests of the Grove of the Patriarchs. Whether you're a dedicated hiker or seeking a scenic getaway, this guide ensures you make the most of your time at Mount Rainier.
Since many of my family members live out of state, this is the route I love to take them on when they visit Washington. Friends and foreign exchange students enjoy it too—it’s filled with breathtaking views and hits all the must-see spots!

Can You See All of Mount Rainier in One Day?
Let me be upfront: the answer is a clear NO.
This guide is tailored to help you experience the top highlights of Paradise in Mount Rainier during a single day trip.
For first-time visitors, Paradise is the clear winner. With its waterfalls, alpine lakes, incredible hikes, and jaw-dropping views, this region truly lives up to its name. It's the most diverse area of the park, offering a variety of landscapes to explore in a single day, from meadows and rivers to old-growth forests and stunning mountain vistas.
The other areas of the park are definitely worth exploring but they offer fewer experiences in a single day. Often one whole day is spent on just one trail. For example, when I visit the Sunrise Side of Mount Rainier I hike to 2nd or third burrows or I spend a day day hiking to the Fremont Fire Tower. Or when going to the Mowich side, I do just the Spray Park Loop or just the Tolmie Peak Fire Tower Trail. In contrast, the Paradise side provides a variety of hikes, lakes, and scenic viewpoints, making it the ideal choice for first-time visitors who want to pack as much into their day as possible.
Mount Rainier National Park spans 369 square miles—about a third the size of Rhode Island—and is divided into five regions with 4 four main entrances: Paradise, Ohanapecosh, Sunrise, and Mowich Lake/Carbon River.
Here’s an idea of the drive times between these areas:
- Paradise to Mowich Lake: 96 miles / 2 hours
- Sunrise to Ohanapecosh: 32 miles / 1 hour
- Ohanapecosh to Paradise: 25 miles / 45 minutes
Trying to explore multiple regions in one day can easily lead to over six hours of driving, especially with travel to and from Seattle. Not to mention the time needed to explore each area and do some hikes. That’s why it’s smarter to focus on just one region for a day trip.

How to Secure Your Mount Rainier Reservations: What You Need to Know
With the high volume of visitors, especially during the summer months, Mount Rainier National Park now requires timed entry reservations for its most popular areas such as —Paradise and the Sunrise Side of the Mountain. Since this one-day itinerary for a perfect day trip to Mount Rainier focuses on the Paradise side of the park, it's important to understand how the new reservation system works so you are able to visit Mount Rainier and are not turned away at the gate.
In addition to timed reservations, you’ll also need to pay the park’s entry fee or use an America the Beautiful Pass, which can save you money if you plan to visit other national parks throughout the year. Okay, now let’s break down all the key details below for a smooth visit.

Paradise Reservations: What You Need to Know
Reservation Requirement for Paradise : (May 24th to September 2nd,)
Timed entry reservations are required for the Paradise area from May 24th to September 2nd, between the hours of 7 AM and 3 PM. If you're planning to visit outside of these dates or times, no reservation is needed, but during peak season, having a reservation is essential.
( As a local who loves shooting up to Mt. Rainier National Park spur of the moment when the weather is nice, I will be getting my butt up and through that gate Before 7 AM to avoid the reservation requirement.)
The Timed Entry Reservations cost $2 per vehicle, not per person. Each reservation is valid for a single day and covers only one specific area of the park—either Paradise or Sunrise. If you plan to visit both areas in the same day, you'll need separate reservations for each.
Make sure to print your reservation or save it to your phone before heading to the park, as cell service is limited and you may not be able to access your confirmation email at the park entrance.
When booking, you'll choose a two-hour window for your arrival. Once you enter during that time frame, you can spend the entire day in the park and come and go freely. Just remember that your reservation only grants you access during your selected window.

Where Can I Get Timed Entry Reservations for Paradise Mt. Rainier?
Reservations for Mount Rainier National Park can be made through recreation.gov. It’s super important to book early, as spots can fill up quickly, especially on weekends and holidays. (This year almost every weekend was instantly booked up!) Be ready to book ahead of time when timed entry reservations are released or be ready to get up early and enter before 7 am if aiming for a weekend. I did see open days for midweek, especially with the next-day reservations. Here’s how the reservation windows are scheduled:
- May 24th to June 30th Visits: Reservations open on February 21st at 8 AM Pacific Time.
- July 1st to July 31st Visits: Reservations open on April 1st at 8 AM Pacific Time.
- August 1st to September 2nd Visits: Reservations open on May 1st at 8 AM Pacific Time.
Last-Minute Reservations:
For those planning a spontaneous trip, next-day reservations are available starting May 24th. These open up at 7 PM Pacific Time the evening before your visit on recreation.gov, but they go fast, especially on weekends.
Entry Points:
Your Paradise reservation is valid for entry through both the Nisqually and Stevens Canyon Entrances, giving you flexibility on how you want to enter the park.

Mount Rainier National Park Park Entry Fees
In addition to your timed reservation, you’ll need to pay the park entrance fee. Mount Rainier National Park charges the following fees:
- Private Vehicle: $30 (valid for 7 days)
- Motorcycle: $25 (valid for 7 days)
- Per Person (on foot or bicycle): $15 (valid for 7 days)
These fees can be paid upon arrival, or you can purchase your entry pass online in advance at recreation.gov.
OR
America the Beautiful Pass:
If you plan to visit more than one national park this year, I highly recommend purchasing the America the Beautiful Pass. This pass costs $80 and grants entry to all U.S. national parks and federal recreational lands for an entire year. It’s a great way to save if you’re a frequent traveler, and you can purchase this pass ahead of time either online or at the entrance to the park.
I definitely recommend purchasing the America the Beautiful Pass in advance. This can help you skip the traffic jam at the entrance of the park. Sometimes they even have a separate line for pass holders where you can bypass the slow line of people who didn't get a pass ahead of time. Click to Get Your Pass Here.

Additional Tips for Planning Your Visit To Mount Rainier National Park
- Reserve Early: To avoid disappointment, book your timed entry reservation as early as possible, especially if you plan to visit during the busy summer months.
- Parking Considerations: Paradise is a popular spot, and parking fills up fast. Even with a reservation, plan to arrive early in the day to secure a parking spot at pullouts and the main paradise area.
- Timed Entry Flexibility: Once you’re in the park, you can stay as long as you like for the day, so plan ahead to make the most of your time.
- Cancellation Policy: If your plans change, remember to cancel your reservation to free up space for other visitors. Check recreation.gov for any applicable cancellation fees.
- Print Out Your Timed Entry Pass Ahead of Time: Cell service at the gate may be spotty or nonexistent. Screenshot or print out your reservation to avoid disappointment at the park entrance.
Starting Your Mount Rainier Day Trip!

Start at the Nisqually Entrance
This one-day itinerary is lined up to maximize your time to see as many breathtaking stops as you can see in a day while still getting in plenty of time to really explore the paradise area and fit in several hikes. The best entry point for this itinerary is the Nisqually Entrance, located on the southwest side of the park. If you’re coming from Seattle, the drive takes about 2 hours, so plan to leave early to maximize your time in the park.
Begin your day at the Nisqually Entrance around 7 or 8 AM to ensure you have plenty of time to explore. This is one of the most popular entry points into the park, and by starting early, you’ll avoid the worst of the crowds. (If coming from Seattle This means getting out the door by 5 or 6 am) If you have a timed entrance reservation you can leave later but you will not have time to do everything mentioned on this itinerary. Maybe not hiking the full skyline loop at paradise or cutting off some stops. This layout usually works fine with arriving at 8 am but arriving at 7 gives more time at each stop.
Directions To the Nisqually Entrance or Mount Rainier National Park From Seattle
Starting in Seattle, head south on Interstate 5 (I-5). Stay on I-5 South for about 40 miles, passing through Tacoma along the way.
Once you're past Tacoma, take Exit 127 for WA-512 East, heading toward Puyallup. Continue on WA-512 for about 2 miles, then take the exit for WA-7 South toward Spanaway/Pacific Avenue. Follow WA-7 South (Pacific Avenue) for approximately 30 miles. You'll pass through small towns like Spanaway, Elbe, and Ashford.
After driving through Ashford, stay on WA-706 East, also known as National Park Highway. This road will lead you straight to the Nisqually Entrance, which is about 5 miles from Ashford.
The drive should take around 2 to 2.5 hours, depending on traffic. Once inside the park, follow the signs to your next destination, such as Paradise or one of the scenic viewpoints!
Stop at Longmire

As you drive through the park, enjoy the towering trees and lush landscapes. Your first stop is Longmire, just 6 miles from the entrance. Longmire is home to the park’s historic district and serves as a great place to stretch your legs and get acquainted with the park’s history. There is also a super cute gift shop with different souvenirs than the one at Paradise. There is also a bathroom which makes for a great pit stop if you had a long drive. There is a really cool wood round from a massive tree with dates of when historical events in history took place.
If you have extra time or arrive early, consider walking the Trail of the Shadows, a short 0.7-mile loop with interpretive signs about the area’s rich history and ecology. This trail gives a lot of history and is a nice early morning stretch where you can see water bubbling up from natural springs.


Stop at Christine Falls
Your next stop is the Christine Falls Viewpoint. This is a real quick pullover stop with no hiking involved. Christine Falls is one of the park’s most picturesque waterfalls, cascading 69 feet beneath a beautiful historic stone bridge. You can easily view the falls from the roadside pull-out, but for a better angle, take the short walk down to the lower viewpoint. This lower viewpoint is definitely worth the extra few steps.
I love photographing Christine Falls using a longer shutter speed to create that beautiful, soft, silky water effect. It’s such a picturesque waterfall! This is a stunning quick stop that I highly recommend doing on your Mount Rainier Day Trip.


Stop at Narada Falls
A few miles up the road, you’ll come to Narada Falls, which is equally stunning but much larger. Narada Falls drops 168 feet and creates a misty, magical atmosphere around its base. A short, steep trail takes you down to a viewpoint where you can see the full scope of this massive waterfall. Make sure to bring a waterproof camera or keep your phone dry, as the spray from the falls can soak you quickly, especially in early summer.
For more info on Narada Falls Check out my blog post: Narada Falls (Paradise Mt. Rainier Hikes)
")


Make a Quick Stop to Take In the Impressive Views of Mount Rainier at One of the Numerous Scenic Pull-Offs
As you continue your drive toward Paradise, keep an eye out for pull-over spots offering stunning views of Mount Rainier. There are several spots that you will see while driving up the super windy road to Paradise where you will want to just pull over and stare at the stunning vistas of Mount Rainier. These stunning viewpoints scattered along the way give you the chance to stop, snap photos, and fully appreciate how small you are next to this massive mountain.

Lunch at Paradise
Arriving at Paradise by late morning or early afternoon, you’ll be greeted by the park’s most iconic panoramic views. This area is named for its incredible beauty, with wildflower meadows blanketing the landscape in vibrant colors during the summer. There are several picnic tables around the Paradise visitor center but these often fill up quickly.
For lunch, you have several options:
1. Pack a Lunch: There are plenty of picnic areas around the Paradise Visitor Center where you can enjoy your meal with an unforgettable view of Mount Rainier.
At Glacier Vista, Panorama Point, or further along the Pebble Creek Trail, you'll find plenty of large rocks ideal for enjoying your lunch. Sit on a rock and savor your meal while gazing at the awe-inspiring Nisqually Glacier and Mount Rainier towering above, or take in the stunning views of the Tatoosh Range, Mount Adams, Mount St. Helens, and Mount Hood. This is honestly one of the best ways to eat a sandwich and snacks in nature.


3. Paradise Inn Café: If you’d rather not worry about packing food, the historic Paradise Inn offers a café with a variety of sandwiches, soups, and snacks. Both the restaurant and café at Paradise Inn operate seasonally, typically from May to early October. The restaurant serves breakfast, lunch, and dinner, along with a Sunday brunch. The café provides hot drinks and quick, grab-and-go options for a convenient meal.
4. Paradise Camp Deli: Located in the Jackson Visitor Center, the Paradise Camp Deli serves as a cafeteria option, typically open on weekends and holidays during the winter, and daily from May through early October. However, recent renovations have reduced the available seating, so finding a spot to sit might be challenging during peak times.

Afternoon Hike: Skyline Trail, Nisqually Vista Trail, or Alta Vista Trail
Skyline Trail To Panorama Point
(Harder than the other two but this is my favorite of the three.)
After lunch, it’s time to hit the trails, and there's no better choice than the Skyline Trail. As one of the most iconic hikes in Mount Rainier National Park, this 5.5-mile loop delivers some of the most breathtaking views in the park. Starting at Paradise, the trail winds its way through alpine meadows dotted with vibrant wildflowers, especially during the summer bloom. It’s not uncommon to spot marmots sunbathing on rocks or hear them whistling as you make your way up. The trail offers an up-close view of glaciers, including the Nisqually Glacier, and on a clear day, you’ll be treated to stunning panoramas of Mount Rainier’s snow-capped summit looming above.
The hike can be moderately challenging due to the 1,700 feet of elevation gain, but the steady climb is rewarded with spectacular vistas along the way, especially from Panorama Point. At this high point, you can take in sweeping views of the Tatoosh Range, Mount St. Helens, Mount Adams, and even Mount Hood on the horizon. The Skyline Trail's combination of varied terrain, incredible scenery, and abundant wildlife makes it a must-do for anyone visiting the Paradise region of Mount Rainier, whether you’re an experienced hiker or just looking for an unforgettable day on the mountain.


Alta Vista Trail
Another great alternative is the Alta Vista Trail, which offers impressive views without the difficulty of longer hikes like the Skyline Trail. This 1.7-mile roundtrip hike takes you up to a high vantage point, where you'll be rewarded with stunning panoramas of Mount Rainier, Paradise meadows, and the surrounding mountain ranges. Though it does have some elevation gain, it’s much more manageable than the Skyline Trail, making it a perfect option if you're short on time or prefer something a little easier. Alta Vista still delivers incredible vistas and a chance to soak in the beauty of Mount Rainier without the full commitment of a longer, more challenging hike.


Take In Picture-Perfect Views at Reflection Lakes
After exploring and hiking at Paradice you can continue your journey with a stop at Reflection Lakes. This is one of the most photographed spots in the park, and for good reason—on clear days, Mount Rainier reflects perfectly in the still waters of the lake. This iconic spot is absolutely stunning when the conditions are right.
For the best experience, aim to visit on a clear, sunny, and windless day to capture the perfect reflection. If the weather isn’t ideal—such as hazy, smoky, or breezy conditions—the view might not be as spectacular. Reflection Lakes is an excellent place to pause and snap some postcard-worthy photos. Late afternoon often provides the best lighting for photography, with its softer tones and reduced crowds. For the clearest reflections, head to the right side of the lake on a beautiful calm day.

Check Out Box Canyon on Your Mount Rainier Day Trip Adventure
Next, head to Box Canyon for a quick stop on your Mount Rainier day trip. This fascinating geological feature is an impressive 180-foot deep narrow gorge carved by glacial meltwater over centuries. There’s a short trail around the canyon that provides great views of the deep chasm and the rushing water below. This stop won’t take much time, but it’s an interesting and unique feature worth seeing. It is amazing how deep the river has carved down into the rock. Be careful you do not want to drop your phone here.


Finish Your Adventure with a Stroll Among the Giant Trees in the Grove of the Patriarchs
End your day with a peaceful hike through the Grove of the Patriarchs. This easy 1.5-mile roundtrip trail leads you through an ancient old-growth forest, where towering trees that are over 1,000 years old create a peaceful and awe-inspiring environment. The trees here are truly colossal. Even with your entire family holding hands, you won't be able to encircle some of these giants completely. Or at least 5 people holding hands couldn't reach around some of these trees. The trail is flat and shaded, making it a perfect way to wind down after a full day of exploring. Cross the suspension bridge over the crystal clear blue-green waters of the Ohanapecosh River and take in the beauty of these ancient giants before hitting the road home and calling it a day.


Getting Back
After completing your hike through the Grove of the Patriarchs, take the faster route back to Seattle via Highway 123 and US-12, which bypasses the need to return to the Nisqually Entrance. This scenic drive provides an efficient exit from the park and takes you through more beautiful mountain landscapes as you head toward home.
Can You Do a Day Trip to Mount Rainier National Park from Seattle, or Should You Stay Closer?
Of course, staying closer to where you want to go can make your visit easier. But you can absolutely do a day trip to Mount Rainier from Seattle. Driving to Paradise, the focus of this itinerary, from Seattle takes about 2 to 2.5 hours, depending on traffic. I often make the same drive from near the Bremerton area, and it’s completely manageable for a day trip. Yes, it’ll be a long day with plenty of driving, but you’ll still have ample time to take in the stunning sights and hikes Paradise has to offer, making the journey 100% worth it.

What to Pack for A Day Trip To Mount Rainier National Park
Mount Rainier’s unpredictable weather and diverse terrain mean it’s crucial to come prepared, especially since conditions can shift quickly at higher elevations. Here's a breakdown of essentials to pack for a comfortable and safe day in the park:
- Waterproof Jacket: Rain is always a possibility, even on sunny days. A lightweight, breathable waterproof jacket is a must to keep you dry. (In my beginning hiking years I was unexpectedly caught in a torrential downpour on Mt. Rainier. The forecast was supposed to be 75 degrees and sunny instead it was rain, hail, and lightning. Mt. Rainier often creates its own climate where unexpected weather happens.)
- Down Jacket: Temperatures at higher elevations can drop suddenly, especially in the early mornings or late afternoons. A down jacket provides warmth without being too bulky, and it packs easily into your backpack. (In August I have had snowflakes lightly come down while hiking at Mt. Rainier at that high of elevation it can get cold even in summer.)
- Hiking Boots or Sturdy Shoes: With uneven trails and potential snow patches even in summer, having solid, broken-in hiking boots or shoes with good grip is great for navigating the terrain comfortably and safely.
- Backpack: A sturdy backpack is key for carrying all your essentials, including plenty of water, snacks, and lunch. Hydration is important, especially at higher altitudes, where dehydration can sneak up on you.
- First Aid Kit: It’s always smart to carry a basic first aid kit for unexpected scrapes, blisters, or other minor injuries that can happen on the trail.
- Sunglasses and Sunscreen: Even if it's overcast, the UV rays are stronger at higher altitudes. I’ve had some of the worst sunburns of my life hiking in the snow on Mount Rainier! Be sure to bring sunscreen and sunglasses to protect your skin and eyes from the harsh sunlight. The harsh glare of the snow can leave you squinting and struggling to see.
- Hat and Gloves: Even in summer, mornings and evenings can be chilly, and a lightweight hat and gloves will keep you warm during those cooler parts of the day.
- Trekking Poles: If you’re planning on hiking some of the steeper trails, trekking poles can offer extra stability and support, especially on uneven or rocky paths. Helps save your knees on the way down!
- Map or GPS: While many of the trails in Mount Rainier National Park are well-marked, it’s always a good idea to carry a map or use GPS to ensure you stay on track, particularly on longer hikes.
- Layers of Clothing: Dressing in layers is crucial in Mount Rainier’s varying conditions. Start with a moisture-wicking base layer to keep sweat off your skin, followed by an insulating layer (like a fleece or thermal shirt) for warmth, and top it off with a waterproof or windproof outer layer to shield you from the elements. This allows you to add or remove clothing as the temperature changes throughout the day.
- Snacks and High-Energy Food: Long hikes can take a lot out of you, so pack plenty of snacks that will give you a quick energy boost. Granola bars, trail mix, dried fruits, and jerky are excellent options. If you're planning on being out all day, pack a heartier lunch, such as sandwiches or a ready-to-eat meal.
- Reusable Water Bottle or Hydration Pack: The higher elevation and physical activity can dehydrate you faster than expected. A hydration pack allows for hands-free drinking while hiking, and if you go with a bottle, try to pack at least 2 liters of water for a full day in the park. Consider adding an electrolyte supplement to your water if you’re tackling longer trails.
- Headlamp or Flashlight: Even if you don’t plan to stay until dark, unexpected delays can happen, and having a headlamp or flashlight can be a lifesaver. It’s especially useful if you’re exploring during the shorter daylight hours of spring or fall.
- Camera or Smartphone: Mount Rainier is full of breathtaking vistas, and you’ll want to capture those moments! Whether it's for landscape shots of the mountain, selfies on the trail, or capturing wildlife, don't forget a camera (or just your phone if you prefer). Also, pack extra batteries or a portable charger to make sure you don’t run out of power.
- Insect Repellent: During the warmer months, mosquitoes and other bugs such as horseflies can be a nuisance, especially near lakes and streams. A good insect repellent will help keep them at bay while you’re hiking or having lunch.
- Trash Bags or Ziplock Bags: Always pack out what you bring in. Having a small trash bag or reusable ziplock bags for food wrappers, waste, or anything you don’t want to leave behind helps keep the park clean and beautiful for everyone.
Being well-prepared with these essentials will help ensure you have a safe, enjoyable, and comfortable adventure at Mount Rainier, no matter what the weather decides to do!
When Is The Best Time Of Year To Visit Mt. Rainier?
Late July through September, is often considered the best time for hiking and sightseeing at Mount Rainier. During these months, the majority of trails are snow-free, and you’ll enjoy milder temperatures and blooming wildflowers. However, due to the mountain’s elevation, snow can linger well into July, so be prepared to encounter patches of snow on some trails. Additionally, temperatures can shift dramatically throughout the day, so layering your clothing is crucial.
June is typically still snow-covered, especially in higher elevations like Paradise and Sunrise. This can limit access to certain trails and make some paths slippery, requiring careful navigation.
If you’re interested in winter sports, the colder months from December through March are perfect for snowshoeing and ski touring. During this time, the park transforms into a winter wonderland, offering pristine snow-covered landscapes ideal for these activities. The quieter season provides a serene experience, but be prepared for colder temperatures and unpredictable weather conditions. Always check current snow conditions and trail availability before setting out.

Mount Rainier offers a breathtaking experience for adventurers of all levels, from the towering views at Paradise to the peaceful trails through old-growth forests. Whether you spend your day hiking the Skyline Trail or opt for a more leisurely stroll along one of the shorter trails, every corner of the park offers something unique and unforgettable. Don’t forget to pack smart and prepare for all kinds of weather, as this majestic mountain can surprise you! I hope this blog post helps you have an amazing day packed with adventure. No matter which trail you choose, you’re sure to leave with lasting memories and a deep appreciation for the beauty of Mount Rainier National Park.

Want To Fill Your Life With Adventure?
Join our newsletter for an adrenaline-fueled journey! Receive exclusive updates on travel tips, gear reviews, epic hikes, captivating stories, and inspiration to turn your dreams into reality.
Don't just dream it, live it! Get Out There!
Blog Posts You May Like
5 Reasons You Should Visit Mt. Rainier in the Fall
Narada Falls (Paradise Mt. Rainier Hikes)
Myrtle Falls & Edith Creek – Paradise Mt. Rainier
Lake 22: Great Early Season Hiking In Washington State
Hiking to Maiden Peak from Deer Park in Olympic National Park
Tolmie Peak Fire Tower Trail in Mount Rainier National Park
The Ultimate Guide to Backpacking to Lake Angeles in Olympic National Park
The Ultimate Guide to Backpacking Lake Ingalls and Headlight Basin in Washington State
Snowshoeing the Scenic Skyline Lake Trail in Washington State
Snowshoe Snoqualmie’s Gold Creek Pond Trail
A First-timer’s Guide to Snowshoeing at Mt. Rainier
High Rock Lookout – Hiking in Gifford Pinchot National Forest
Backpacking Upper Lena Lake – Olympic National Park
Milk Lake: Beautiful Hidden Gem in Olympic National Park
How to Successfully Do A Sunrise Hike Up Mt. Townsend
The Ultimate Guide To Hiking Mailbox Peak
Marymere Falls – Easy Hike in Olympic National Park
Franklin Falls Easy Beautiful Winter Hike Near Seattle
Best Hikes in Washington State: Blanca Lake


